Nowadays, most families will install an integrated ceiling bathroom heater for the ceiling of the bathroom space, because it integrates lighting, heating and decoration, allowing everyone to enjoy the warmth while bathing. But what is the installation method of the integrated ceiling bathroom heater? And listen to Xiaobian to come one by one for you.

Installation method of integrated ceiling bathroom heater 1, corner line
The installation of the collecting bar needs to be smooth and firm, determine the installation height, and draw a horizontal line. After tiling the tiles well, level the corners of the integrated ceiling tightly on the tiles so that there are no obvious gaps.

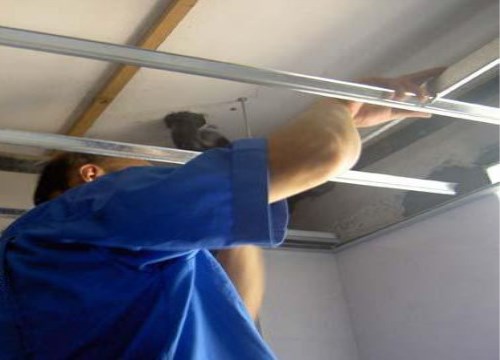
Integrated ceiling bathroom heater installation 2, keel
Lower boom and mounting light steel keel, the distance between boom and keel should be as close as panel size. Drill the expansion eye on the top and fix all the hangers. Connect the bottom of the hanger to the hook, and then fix the main dragon skeleton in the middle of the hook and fix it. Adjust the height nut so that the bottom plane of the main keel is 3cm away from the top line of the edge strip And tighten. Then, it is the installation of the keel. According to the actual installation length minus 5mm, intercept the required sub-keel, put on the triangle hanger, and temporarily hang all the sub-keels with the triangle hanger on the main keel according to the drawings.
Integrated ceiling Yuba installation 3. Buckle plate
Wear clean gloves and consider the overall beauty and symmetry on both sides when installing the gusset. Fix the template, use a utility knife and a ruler to describe more than three times, cut the bent edge with scissors at a 90-degree angle, and fold it by hand 2-3 times. Snap the corresponding surface of the template cutting opening into the keel, cut the surface of the cutting frame on the edge strip, and pull out the edge strip clamping position to clamp the template. At this time, the triangle hanger can be clamped with the main keel . During the installation of the middle part template, the two corresponding surfaces of the template are respectively stuck in the keel to control the gap between the templates and maintain the straight line of the joint.

Integrated ceiling Yuba installation 4. Host
When designing the installation location of the heating type host according to the drawings, replace the template with the host panel to confirm the accurate host installation position; then place the host box on the top of the keel and fix it.

Integrated ceiling bathroom heater installation 5, top wiring and mouth panel
Route at the top to determine where lamps need to be installed and where kitchen appliances must be installed, and arrange the wiring in advance. The buckle panel is directly related to the overall effect of the ceiling. Not only to make it flat, but also to make the seam straight.

Editor's remarks: Well, the installation method of the integrated ceiling bathroom heater is introduced here, and I hope it can help everyone. If you want to know more about building materials, please continue to pay attention to this website, thank you for watching!
What, the decoration still uses his own money? ! The Qi family is decorated in installments, with an ultra-low annual interest rate of 3.55% and a maximum loan of 1 million. Apply now to enjoy the discount
If you are interested in brand cooperation, content cooperation, and advertising of this website, please send an email to :.
Integrated ceiling bathroom heater installation
Fixer Frame Door & Window
Fixer Frame Door & Window
Hebei Charlotte Enterprise Co., Ltd. , https://www.cnscreening.com